Golang has quickly evolved into an exciting language for web application backend development. Its static typing, concurrency primitives, and powerful standard library make it a very viable alternative to popular frameworks like Express.js, Django, and Laravel.
In this tutorial, we’ll write a simple web application that lets users execute whois queries on a domain name or IP address. We will then deploy the application on a LunaNode cloud server. At the end, I’ll provide some pointers for writing more advanced applications.
I’m going to assume some existing exposure to Golang. If you haven’t used Golang at all, check out the Golang Tour!
1. Serve A Static Webpage
Create a new directory whois-app for our project. Then, create a subdirectory whois-app/static/ for our static files, and whois-app/main.go for our application backend.
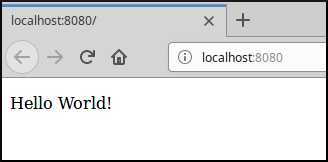
Create a simple webpage in whois-app/static/index.html for now:
<!doctype html>
<html>
  <body>
    <p>Hello World!</p>
  </body>
</html>
Your directory structure should now look like this:
whois-app/
          static/
                 index.html
          main.go
Great! Let’s update main.go to serve the static files:
package main

import (
    "log"
    "net/http"
)

func main() {
    // Create a fileServer handler that serves our static files.
    fileServer := http.FileServer(http.Dir("static/"))

    // Tell the http library how we want to handle requests.
    // For now, we simply pass the request to the fileServer.
    http.HandleFunc(
        "/",
        func(w http.ResponseWriter, r *http.Request) {
            fileServer.ServeHTTP(w, r)
        },
    )

    // Finally, start the HTTP server on port 8080.
    // If anything goes wrong, the log.Fatal call will output the error to the console and exit the application.
    log.Fatal(http.ListenAndServe("localhost:8080", nil))
}
The fileServer is of type http.Handler , an interface with a single function:
func ServeHTTP(http.ResponseWriter, *http.Request)
Essentially, this function should take an HTTP request, process it, and write any output to the ResponseWriter.
http.FileServer returns a Handler that serves requests using files in the directory that we specify.
Now, start up the webserver by running the application:
go run main.go
If you navigate your web browser to http://localhost:8080 , you should see our webpage!
2. Build the Frontend App
Let’s write the HTML and JavaScript that we will serve to the client. We’ll keep it simple: there will be a form for the user to enter an IP address or domain name; submitting that form will initiate an asynchronous POST, and we’ll copy the response to a div.
Here’s the HTML for index.html :
<!doctype html>
<html>
  <body>
    <form id="whoisForm">
      IP Address or Domain Name:
      <input type="text" id="input" placeholder="e.g. 1.2.3.4 or example.com" />
      <button type="submit">Whois</button>
    </form>
    <div id="resultDiv"></div>
    <script src="index.js"></script>
  </body>
</html>
And create a new file index.js for the JavaScript code:
var form = document.getElementById('whoisForm');
form.onsubmit = function(e) {
    e.preventDefault();
    var data = document.getElementById('input').value;
    var div = document.getElementById('resultDiv');
    var xhr = new XMLHttpRequest();
    xhr.open('POST', '/whois', true);
    xhr.setRequestHeader("Content-Type", "application/x-www-form-urlencoded");
    xhr.onreadystatechange = function() {
        if(this.readyState !== XMLHttpRequest.DONE) {
            return;
        }
        var response = JSON.parse(this.responseText);
        if(response.error) {
            div.innerHTML = '<p>' + response.error + '</p>';
        } else {
            div.innerHTML = '<pre>' + response.result + '</pre>';
        }
    };
    xhr.send('data=' + encodeURIComponent(data));
};
3. Implement the /whois Endpoint
Now we just need to update main.go to handle requests on /whois .
First, we’ll add the handler for the endpoint. The handler has four steps:
- Verify the request method is POST
- Extract the query data submitted by the user (IP address or domain name)
- Call a helper function with the query data
- Produce a JSON-encoded response from the helper function’s return value
Here’s the code!
// Handle the POST request on /whois
// The client will send a url-encoded request like:
//     data=8.8.8.8
http.HandleFunc("/whois", func(w http.ResponseWriter, r *http.Request) {
     // Verify this is POST (not e.g. GET or DELETE).
     if r.Method != "POST" {
         w.WriteHeader(http.StatusBadRequest)
         return
     }

    // Extract the encoded data to perform the whois on.
    data := r.PostFormValue("data")

    // Perform the whois query.
    result, err := whoisQuery(data)

    // Return a JSON-encoded response.
    if err != nil {
        jsonResponse(w, Response{Error: err.Error()})
        return
    }
    jsonResponse(w, Response{Result: result})
})
This can go right after the / endpoint handler. The http library will direct requests to the handler whose pattern (like / or /whois ) most closely matches the URL. So now, our /whois handler will handle the POST request from our JavaScript code, while the / handler will take care of everything else.
Above, we’re using two helper functions that we haven’t implemented yet:
whoisQueryshould take the user’s query and return the whois resultjsonResponseshould encode a response and send it to the browser
We’ll implement those in just a second. We also use a struct as a parameter to jsonResponse . Here is the type definition of that struct, which you can add after the main function:
type Response struct {
    Error string `json:"error"`
    Result string `json:"result"`
}
The json:... tags indicate how the fields of the struct should be encoded by the Golang encoding/json library. For example, a struct like this:
Response{Error: "we messed up"}
would be encoded like this:
{"error":"we messed up"}
4. Implement whoisQuery and jsonResponse
Alright, let’s finish up by implementing the two helper functions. You can put these functions at the bottom of main.go .
For whoisQuery , we’ll pass the user data to the github.com/domainr/whois library, and return the result:
func whoisQuery(data string) (string, error) {
     // Run whois on the user-specified object.
     response, err := whois.Fetch(data)
     if err != nil {
         return "", err
     }
     return string(response.Body), nil
 }
jsonResponse encodes the Response struct and writes it to the ResponseWriter :
func jsonResponse(w http.ResponseWriter, x interface{}) {
    // JSON-encode x.
    bytes, err := json.Marshal(x)
    if err != nil {
        panic(err)
    }
    // Write the encoded data to the ResponseWriter.
    // This will send the response to the client.
    w.Header().Set("Content-Type", "application/json")
    w.Write(bytes)
}
We also need to update our imports:
import (
    "github.com/domainr/whois"

    "encoding/json"
    "log"
    "net/http"
)
And that’s it! Install github.com/domainr/whois and run the web application again:
go get github.com/domainr/whois
go run main.go
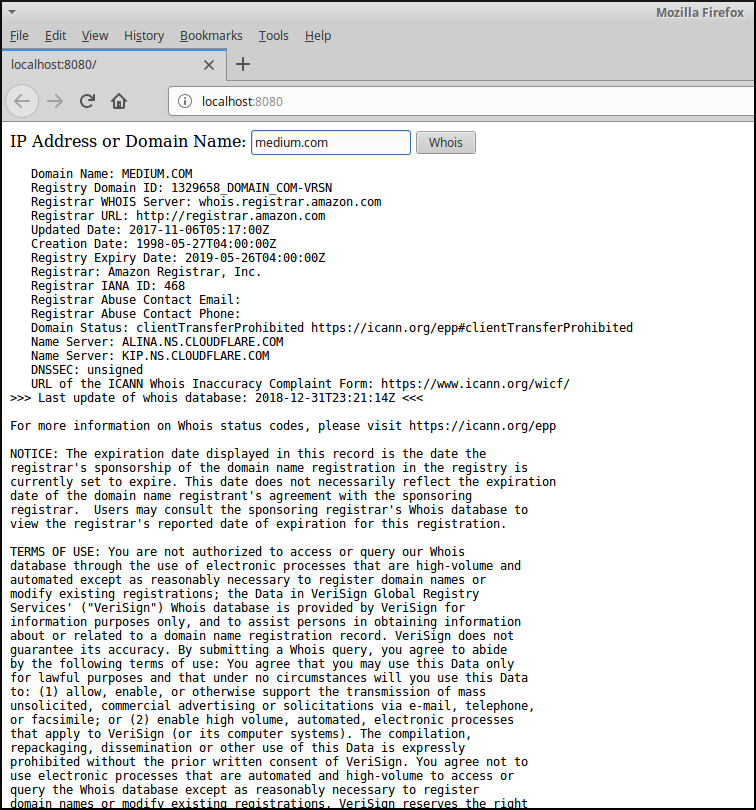
If you navigate to http://localhost:8080 and submit a query, you should get a response:
5. Deploy the Application
Now, let’s deploy the application on a virtual server. Any cloud server platform like LunaNode, DigitalOcean, and Vultr will do, but we’ll go with LunaNode just because they’re the cheapest.
If you’re familiar with deploying web applications written in other languages, there probably won’t be much new in this section.
First, if you don’t already have a LunaNode account, sign up for one. Then, create a virtual machine: from their dashboard, press Create VM, select a region, and enter the required details; for the OS, select an Ubuntu template (you can select whatever you’re most familiar with, but below I’ll assume you’re running Ubuntu 16.04).
Once the VM is online, it’ll have an IP address to connect to. If you didn’t set an SSH key, there will also be a username and password.
So, SSH into the VM:
ssh [email protected]
And install a few packages. nginx is a webserver that can be used as a reverse proxy. (Note: if you get a dpkg lock error, you might have to wait a minute for the automatic upgrade to complete.)
sudo apt install -y nginx golang
Copy your web app files from your local computer to the cloud VM:
cd /path/to/whois-app
rsync -av ./ [email protected]:whois-app/
We need to modify the nginx configuration so that it forwards HTTP requests to our Golang app, which will be listening on localhost:8080. From SSH, edit /etc/nginx/sites-enabled/default and replace it like this:
server {
    listen 80;
    location / {
        proxy_pass http://127.0.0.1:8080;
    }
}
Restart nginx to update the configuration, and run main.go:
sudo systemctl restart nginx
cd /home/ubuntu/whois-app/
go get github.com/domainr/whois
go build .
./whois-app
You should now see the web app at http://[Your VM IP]/ !
Daemonize The Application
We need to run the Golang app in the background so that it stays online after we log out of SSH. We could do this with nohup or a screen session, but it’s best to use a system process manager like systemd — it’ll take care of starting the app if the VM reboots, restarting the app if it crashes, and will also make it possible to manage the app with the same commands used to manage other system services.
Define the service by creating a file /lib/systemd/system/whois-app.service with these contents:
[Unit]
Description=whois app service

[Service]
Type=simple
ExecStart=/home/ubuntu/whois-app/whois-app
Restart=on-failure
RestartSec=30

[Install]
WantedBy=multi-user.target
Then, start the app, and also enable it so it starts on boot:
sudo systemctl start whois-app
sudo systemctl enable whois-app
That’s it for the tutorial — hopefully you enjoyed it! Below, I’ve included a few pointers in case you’re interested in developing larger apps with Golang!
6. Pointers for Further Development
Templates
For whois-app , our front-end consisted of static files that interacted with the Golang web app via asynchronous calls. But in many web apps, you may want to serve dynamic content directly as HTML.
At the same time, you don’t want to simply use fmt.Sprintf to inject dynamic parameters into HTML content, because that often leads to XSS attacks, and doesn’t encourage good model-view separation.
Luckily, html/template is a solid HTML templating library, and it’s part of the standard library!
https://golang.org/pkg/html/template/ has a good introduction on using the package.
Gorilla
Gorilla advertises itself as “the golang web toolkit”. Indeed, it provides a lot of functionality that’s useful for developing web apps, including session management and a WebSocket library.
gorilla/mux is especially useful, improving on http.HandleFunc (which uses http.ServeMux) in many ways. For example, you can set parameters in your routes, and fetch them from the handler function:
router.HandleFunc(
    "/objects/{uuid:[a-z0-9-]+}",
    func(w http.ResponseWriter, r *http.Request) {
        uuid := mux.Vars(r)["uuid"]
        // ...
    },
)
And you can configure the request methods accepted by a route:
router.HandleFunc(...).Methods("POST")
Middleware
Golang’s support for first class functions makes it easy to write middleware. For example, suppose you want to log each HTTP request. Obviously, you don’t want to add a log call to every handler. An http.HandlerFunc looks like this:
func(w http.ResponseWriter, r *http.Request)
So we’ll create a function that will take an http.HandlerFunc as an argument, and return a modified http.HandlerFunc that includes the logging functionality:
func logFunc(f http.HandlerFunc) http.HandlerFunc {
    return func(w http.ResponseWriter, r *http.Request) {
        log.Printf("%s %s", r.Method, r.URL.Path)
        f(w, r)
    }
}
We can enable logging on a handler by passing it through logFunc when we register it:
simpleHandler := func(w http.ResponseWriter, r *http.Request) {
    w.WriteHeader(http.StatusOK)
}
http.HandleFunc("/", logFunc(simpleHandler))
Code Organization
In a large project, throwing everything into one file will quickly turn into a big mess. We’ll want to intelligently split up our code into different modules that will go in different files.
This blog post has several tips on code organization for Golang web applications.