Zulip is an open source chat software for teams, and is an excellent self-hosted alternative to Slack.
In this tutorial, we’ll install Zulip on an Ubuntu server; the steps will work with Ubuntu 16.04 or Ubuntu 18.04. In the end, we’ll have a website like this:
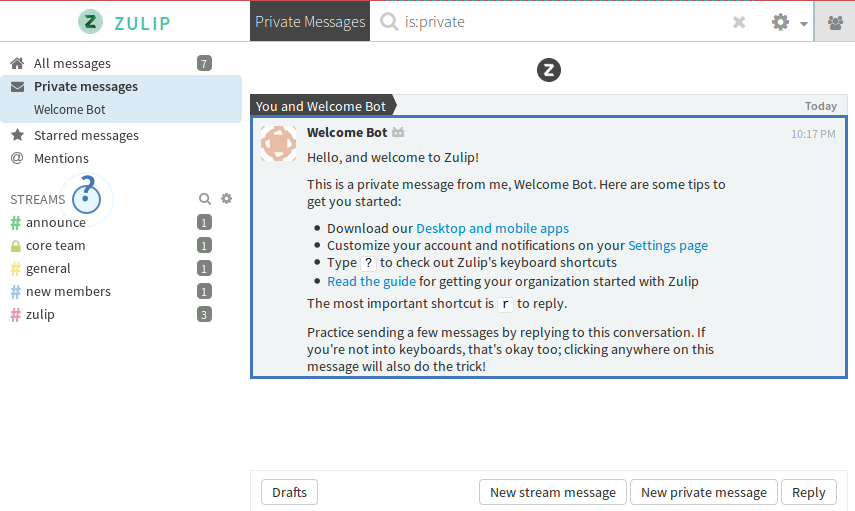
Awesome, huh? Alright, let’s get started! Don’t worry — this will be quick because the Zulip developers made the installation process super easy!
Download and extract the latest Zulip release:
cd /tmp
wget https://www.zulip.org/dist/releases/zulip-server-latest.tar.gz
tar -xf zulip-server-latest.tar.gz
If you have a domain name, configure the DNS on a subdomain to point to your server, and run the Zulip installer, replacing zulip.YOURDOMAIN.com with your subdomain:
sudo ./zulip-server-*/scripts/setup/install --certbot [email protected] --hostname=zulip.YOURDOMAIN.comZulip will automatically acquire a free SSL certificate from Let’s Encrypt.
If you don’t have a domain name or subdomain, you can install Zulip with a self-signed SSL certificate and access it directly with your server’s IP address, but you’ll get an SSL warning in the browser (replace A.B.C.D with your server IP):
sudo ./zulip-server-*/scripts/setup/install --self-signed-cert [email protected] --hostname=A.B.C.DThe installation will take several minutes. After it’s done, the installer will pop out a URL to setup our Zulip website:
Please visit the following secure single-use link to register your
new Zulip organization:

    https://zulip.example.com/new/d18x19mei78ytxjnyfmsypyi
Open up the link in a browser. There will be a page asking us to create a new Zulip organization:
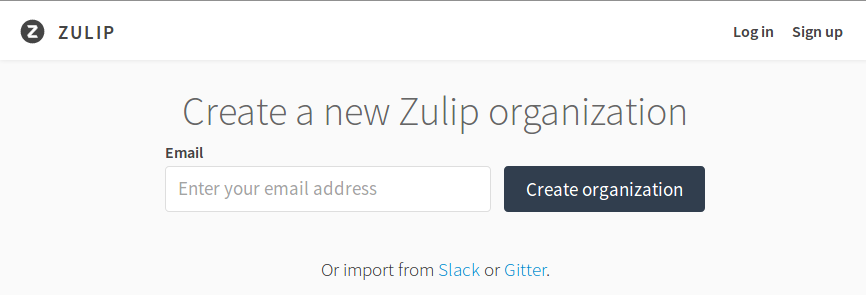
Fill out your e-mail address and press Create organization. The setup page will ask for a few more details like the organization name; fill out those as well. After that, we’re done, and you’ll be redirected to your Zulip app!
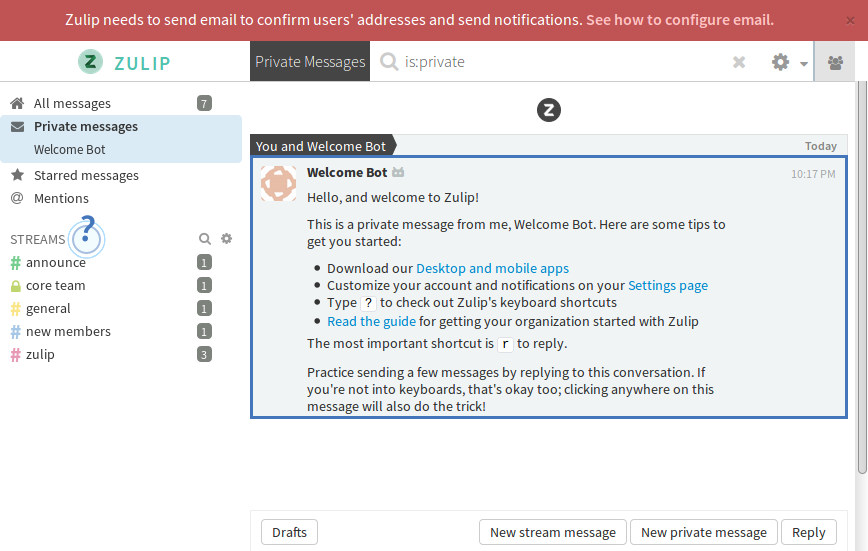
Configure Email
Right now, we have a big red bar telling us that we need to configure email. So let’s do that!
If you don’t have an SMTP server for your domain, install one on the server:
sudo apt install -y postfixEdit /etc/zulip/settings.py; update the settings under “Outgoing email (SMTP) settings”. If you installed Postfix, then update the settings like this:
# EMAIL_HOST and EMAIL_HOST_USER are generally required.
EMAIL_HOST = 'localhost'
#EMAIL_HOST_USER = ''

# Passwords and secrets are not stored in this file.  The password
# for user EMAIL_HOST_USER goes in `/etc/zulip/zulip-secrets.conf`.
# In that file, set `email_password`.  For example:
#   email_password = abcd1234

# EMAIL_USE_TLS and EMAIL_PORT are required for most SMTP providers.
EMAIL_USE_TLS = False
EMAIL_PORT = 25
(If you’re not using local Postfix, you may need to enter the SMTP password in /etc/zulip/zulip-secrets.conf under email_password.)
Then, restart Zulip:
sudo -u zulip /home/zulip/deployments/current/scripts/restart-serverAfter Zulip comes back online, go back to the browser window where Zulip is open; you should now be able to invite users to your Zulip app by clicking “Invite more users”!
Happy chatting!